
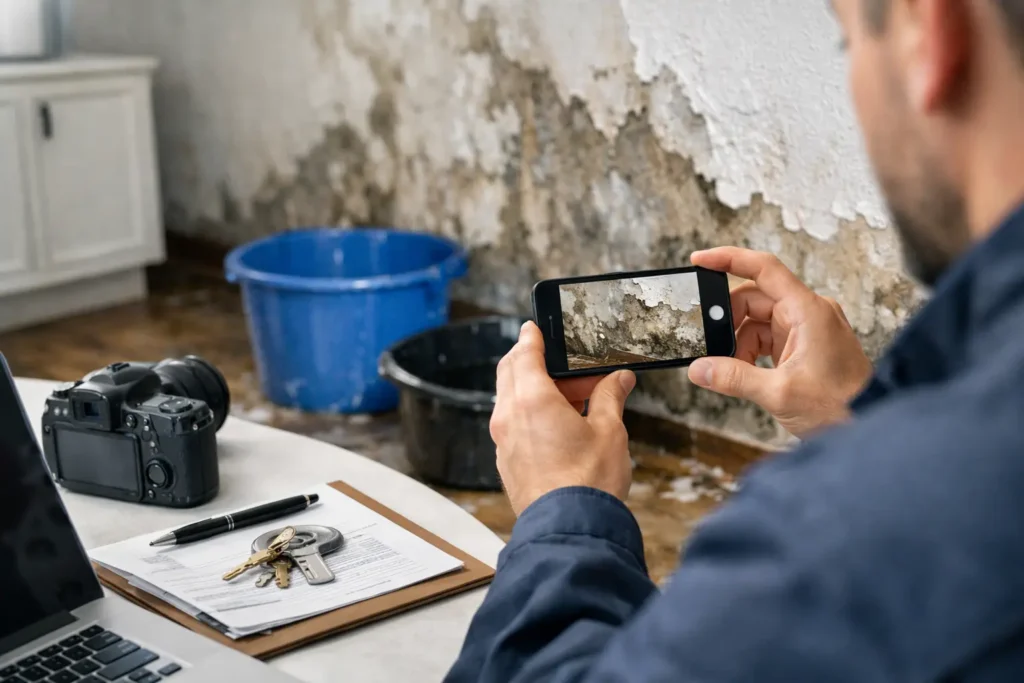
A burst supply line can soak drywall, flooring, cabinets, and belongings long before the full extent of the loss is visible. In those first stressful minutes, documenting water damage photos gives you a clear record of what happened, what was affected, and why immediate mitigation was necessary. Good photos can support your insurance claim, protect you from disputes, and help a restoration team make faster decisions.
But documentation should never delay safety or emergency cleanup. If water is near electrical outlets, the ceiling is sagging, sewage is present, or water is actively spreading, move to a safe area and call for help first. The goal is to preserve evidence while limiting additional damage.
Start Before Anything Is Moved or Cleaned
Take wide photos of every affected room before removing wet belongings, mopping, extracting water, or opening walls. Stand in the doorway and photograph the room as a whole, then take images from each corner. This establishes the scope of the loss and shows how water traveled through the property.
Include the likely source when it is safe to do so. For example, photograph a burst pipe, failed water heater, overflowing appliance hose, roof leak, backed-up drain, or storm-damaged opening. Do not touch damaged electrical equipment or climb onto a roof to get a better angle. A useful photo is never worth a fall, shock, or exposure to contaminated water.
If you live in Metro Atlanta, fast-moving water losses are especially common after supply-line failures, appliance leaks, and heavy storms. The visible puddle may be only part of the problem. Water can move beneath flooring, behind baseboards, through insulation, and into adjacent rooms.
What to Capture When Documenting Water Damage Photos
Your photos should tell the story of the event without requiring someone else to guess what they are seeing. Start wide, move closer, and capture details last. That sequence makes each image easier to understand when an adjuster reviews it later.
Photograph standing water, wet carpet, warped flooring, swollen trim, stained ceilings, peeling paint, damaged cabinets, and visible mold-like growth. Take pictures of furniture, electronics, clothing, inventory, tools, or personal items affected by water. For commercial properties, document impacted offices, tenant spaces, stock, equipment, records, and areas that cannot safely operate.
Close-up images matter when they show a specific condition: a water line on drywall, buckled laminate, a damaged pipe fitting, or a serial number on an appliance. Use natural light or your phone flash if needed, but avoid blurry photos. Take several angles rather than relying on one image.
Do not throw away damaged items until your insurer gives direction, unless they create a health or safety hazard. If wet materials must be removed because they are contaminated, unstable, or preventing drying, photograph them thoroughly first. Keep a simple written list of what was discarded, including the item, brand if known, approximate age, and reason it had to be removed.
Use Scale and Context
A close-up of a stain can be difficult to interpret. Add context with a photo that shows where the damage sits in the room, then take a closer image with a measuring tape or common object for scale when appropriate. This is particularly useful for ceiling stains, damaged drywall sections, floor buckling, and the height of water marks.
If a pipe burst inside a cabinet or wall, photograph the surrounding area as well as the failed component. A claim reviewer needs to understand not only that a fitting failed, but also the resulting impact on the structure and contents.
Preserve Dates, Files, and Original Images
Most phones automatically save the date and time a photo was taken. Keep those original files. Avoid filters, heavy editing, screenshots, or cropping that removes useful context. You can make copies for sharing, but retain the originals in case questions arise.
Create a dedicated folder labeled with the property address and date of loss. Back it up to cloud storage, email copies to yourself, or save them on another device. Water damage can affect computers and phones too, and a lost photo library can make an already difficult claim harder to support.
A short video walkthrough can also help. Slowly record each affected room while describing what you see: the source, the visible damage, when you discovered it, and whether water is still active. Video is useful context, but it should supplement clear still photos rather than replace them.
Document the Damage as Conditions Change
Water damage evolves. Materials may look worse after several hours, and professional drying can reveal hidden moisture or save materials that initially appeared beyond repair. Continue taking photos throughout the early stages of the loss.
Capture conditions before mitigation begins, then photograph the work area after extraction, removal of saturated materials, placement of drying equipment, and any necessary demolition. If a restoration company performs moisture mapping or uses thermal imaging, ask for documentation of its findings and daily drying records. These records show why equipment, monitoring, and material removal were needed.
This is where professional documentation can make a meaningful difference. A certified restoration team can identify moisture behind walls and under floors that a camera cannot see. Photos prove visible conditions; moisture readings and drying logs help prove the full extent of the affected area.
At Elevated Operations, the response is built around controlling the loss, not simply taking surface-level pictures. IICRC-certified technicians use commercial extraction equipment, moisture meters, and thermal imaging to document conditions while addressing the water quickly. That combination helps protect the property and gives the claim a stronger factual record.
Keep a Simple Claim Timeline
Photos work best alongside a basic written timeline. Record the date and time you discovered the water, when the source was shut off, who you contacted, and what emergency steps were taken. Include your insurance claim number once one is assigned, as well as the names of adjusters, plumbers, restoration professionals, and property managers involved.
Save receipts for emergency plumbing, temporary lodging, cleaning, equipment rental, and other reasonable loss-related expenses. Keep invoices, estimates, moisture reports, and correspondence in the same folder as your photos. If you speak with your insurer by phone, write down the date, the representative’s name, and the main points discussed.
Do not assume the first visible damage is the complete loss. A wet ceiling may indicate insulation saturation above it. A damp baseboard can mean water has traveled behind the wall. Careful documentation gives you a record if additional damage becomes apparent during mitigation or reconstruction.
Common Photo Mistakes That Can Weaken a Claim
The biggest mistake is waiting too long. Water can be extracted, surfaces can be cleaned, and materials can be removed before anyone has a complete record. Take initial photos as soon as it is safe, even if you know professional help is on the way.
Another mistake is photographing only the source. A broken pipe is relevant, but so are the rooms, finishes, contents, and adjacent areas it affected. Conversely, do not take hundreds of nearly identical images with no organization. A focused set of wide shots, detailed shots, and progress photos is more useful than a disorganized camera roll.
Be accurate in captions and conversations. Do not guess about the cause, age of damage, or what may be hidden behind a wall. Describe what you observed: “Water was flowing from the supply line under the kitchen sink at approximately 7:15 a.m.” Let licensed professionals and the insurance process determine the technical cause and necessary repairs.
When to Call a Restoration Professional
A small, contained spill may only require prompt drying and observation. A larger loss needs a faster response, especially when water has reached drywall, subflooring, insulation, cabinetry, or multiple rooms. Call immediately for sewage backups, contaminated water, ceiling leaks, floodwater, active pipe breaks, or any loss where electricity may be involved.
Professional mitigation is not just about removing visible water. It involves extraction, moisture inspection, controlled drying, sanitation when needed, and documentation that follows the property from emergency response through repairs. Waiting to see whether materials dry on their own can increase the risk of mold, structural deterioration, and a more complicated claim.
Take the photos you can, protect the originals, and then focus on stopping the loss. The strongest record is one that shows the damage clearly while giving trained professionals the chance to prevent a manageable water event from becoming a major reconstruction project.